
Adding an LED light strip to your RV is a simple and effective way to add atmosphere and make your RV look the best in the campground. This article will take you through the process of adding an LED light strip to your RV.
Adding LED lights to your RV is pretty simple. When you have chosen your LED light strip, measure up the area you want to place them and cut to size. Use the adhesive backing to fix the LEDs in place and wire them into the power source.
Installing LEDs to your RV or awning is really simple but there are a few things to get ready before you start that will make everything easier. After reading this guide you’ll be well prepared to install the LED lights as quickly and easily as possible.
Adding an LED Light Strip to Your RV
The easiest way to add an LED light strip to you RV is by following these simple instructions:
1. Choose the Right LED Strip
Choosing the right LED light strip for your RV is probably the biggest decision you’ll have to make in this project.
Depending on where you want to install the lights, primarily inside or outside your RV, will affect which ones you choose.
Typically as with everything the more expensive the LEDs the better the quality, but these are the main features to look out for.
Lumen Rating
The lumen rating is a measure of the brightness of the LED light. Lumen translated from latin means light, which makes sense. The higher the lumens the brighter the light emitted from the LED will be.
LED Light strips can range from 100 to 800 lumens. If you have a medium sized awning then a 1m strip of 800 lumens should be enough to light the area and allow you to read outside at night.
The bigger the awning the more light strips can be added.
The LED Strips IP Rating
The IP rating of an LED light shows the level of protection that it has against moisture and dirt.
There are two numbers that make up the IP rating, the first number shows the level of protection against dirt and dust (0 to 6). If the LEDs are going outside on your awning then you will want the highest level of protection here at 6. [1]
The second number ranges from 0 to 9, and this shows the level of protection against water, I recommend going for 5 and above here.
So the minimum IP rating you will want is 65, but 66, 67, 68 and 69 give higher protection against water.
An IP rating of LED light is the measurement of protection that LED light will have against liquid (water) and solid (dirt, dust etc.) objects. There are two numbers in the IP rating,The first number (0 to 6), in a solid IP rating. It shows the resistance against solid objects.
The LED Power Supply
You’ll need to know how you will power the LED lights, most LED light simply plug into a power outlet. So the only consideration here is whether you will need an extension cord or not.
Some LEDs will need wiring in so make sure that you check the power source and have the right tools ready.
LED Light Features
There are lots of colorful LEDs available now, so if you want something a bit more funky than the standard plain white LEDs then there are plenty of options out there.
You can even get programmable LEDs that can flicker, flash and change color so you can have a disco every night.
Pre Cut LED Strips
Some LED suppliers will pre-cut the light strips before you buy them, this is a great option if you’ve got a high IP rating so you don’t risk damaging the lights by cutting them yourself.
LED Light Strip Options
Some of the best LED light strips available are:
[elementor-template id=”2306″]
[elementor-template id=”2302″]
[elementor-template id=”2298″]
[elementor-template id=”2293″]
2. Choose The Placement
Now you’ve chosen your favorite LED lights, you need to know where your going to place them. If they are going on the awning outside (which is where most people will install them), then the best place is the end of the awning or under the roller, or both.
Keep in mind the power source and try to get the strip as close as possible to it.
3. Get Your Materials
You won’t need to many tools for this job but get the following on hand to make the job easier:
- Bucket of soapy water and sponge
- Ladder
- Scissors
- Double sided scotch tape
- Tape Measure
- LED Lights
4. Clean the Surface
Once you know where you’re putting the lights make sure that that area is cleaned well.
This is probably the most time consuming step, but it’s also the most important otherwise the lights won’t stay up.
Just use soap and water and make sure that you get any stubborn residue off the area. When the area is clean let it dry completely before moving on to the next step.
5. Measure Up
Measure the area where you want to install the LED lights, you want the LEDs to be slightly shorter than the entire length of the awning.
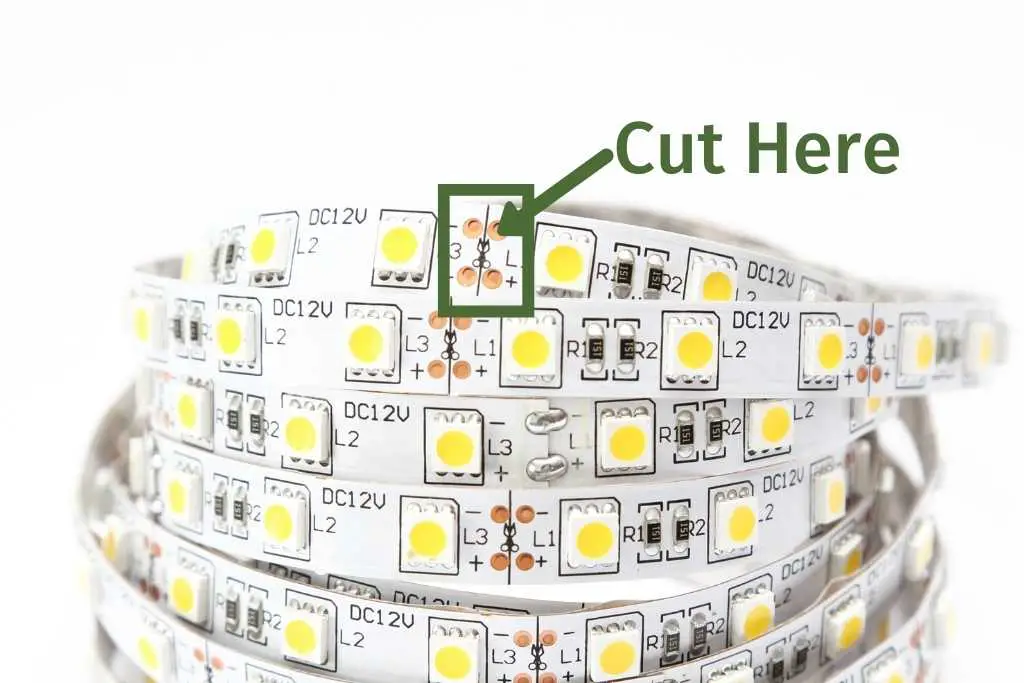
6. Cut the LED Strip
Once you have your measurements then cut the LED light strip to size. Most panels will have a copper dot or line to show you where to cut, make sure you cut where directed or you could ruin the whole strip.
It’s always a good idea to power up the LED strip after you’ve cut it to make sure that it still works.
7. Install the LED Lights
Most light strips come with a self adhesive backing, but as a precaution I’d recommend putting some strong double sided tape down as well.
This Scotch tape is a great cheap tape that will give the lights that added security. Add the Scotch tape to the area where the lights are going.
Peel the paper backing of the LED strip and gently press on the double sided tape to form a strong bond.
8. Power the LEDs Up
Now you just need to turn them on.
There are a number of ways you can get power to your LEDs:
Plug them in – Most people opt for this as it’s the easiest way to get power to the lights. Just plug them into an outlet, you may need an extension cord but it’s pretty straightforward.
Plug them into a battery – this 12V battery for LEDs is a good option if you want to be a bit more discrete than having a plug cable running across your awning. The battery will need recharging every once in a while, but the lights will work even if your RV has no power.
Wiring into the RV porch light – this option is only for people who have some wiring experience. But, you can wire the LEDs into the the porch light, this will mean that when you turn your porch light on the LEDs will come on instead.
Replacing existing LEDs – if you are replacing an existing LED light strip then you just need to wire the new LEDs into the same place the old ones were.
Other RV Lighting Options
If you want to create an atmosphere with lighting outside your RV, but don’t want something as permanent as an LED light strip then there are other great options out there.
Just bear in mind that these will need to be set up every time you camp so if you’re looking for easy outdoor lighting then LEDs are probably the best option for you.
Rope Lights
Rope lights are like LED strip lights, but they are encased in a waterproof clear tube, this makes them flexible and durable.
They don’t have any adhesive backing so will need to be secured in place either with tape or clips. Or you can wrap them around the awning post. Some of my favorite rope lights are:
[elementor-template id=”2313″]
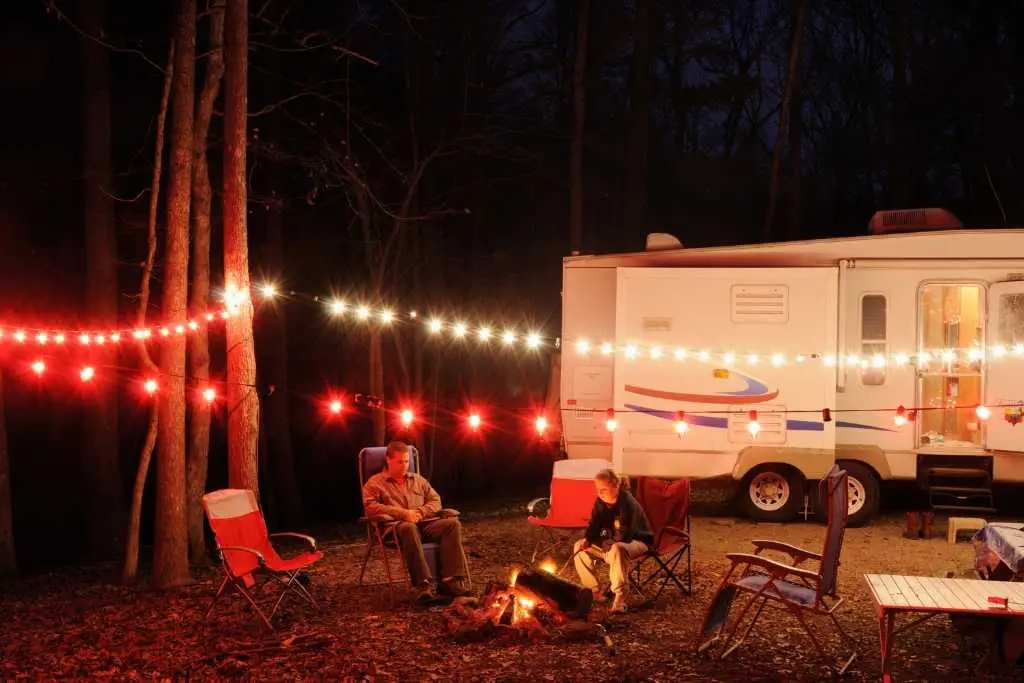
String Lights
I love string lights, they add such a nice atmosphere to your RV and are really versatile. Most string lights are solar powered so you don’t need to worry about them draining your battery.
They usually need a hook or a clip to secure them in place, or you can run them across a nearby tree. My favorite string lights are:
[elementor-template id=”2316″]
Solar Powered Lanterns
These lanterns are lovely, they will elevate your pitch on a night and make you feel warm and fuzzy inside.
My favorite ones are all solar powered so you can just pop them outside and think no more about them until they light up at night.
[elementor-template id=”2319″]
Funky Lights
If all of the above options seem a little dull to you, then you can have fun with these to liven up your pitch.
[elementor-template id=”2323″]
So now you have your beautiful LED lights up in your RV, there are some other questions that RVers have about them.
FAQs
How do you hang LED rope lights?
Once you’ve picked the rope lights you want to hang, check the power source and make sure that the end with the plug is nearest to your power supply.
The easiest way to to hand LED rope lights is to use transparent tape, or adhesive hooks. Choose the strongest double sided adhesive tape you can find and lay that down where you want the lights to go and press the rope light onto the tape to create a firm bond.
If you prefer to use hooks then choose a heavy duty adhesive hook and place them where you want to hang your lights. Arrange the lights around the hooks to keep in place.
Can LED strip lights catch fire?
Yes, LED strip lights can catch fire. To avoid this make sure that you get high quality LED strip lights and read the reviews. Make sure that nothing is in contact with the lights when turned on.
Can I leave LED strip lights on all night?
Yes you can leave the LED strip lights on all night. LED lights omit far less heat than other light sources. However, make sure that there is no risk of fire before leaving your LED strip lights on all night. Make sure they are in no direct contact with anything to avoid fires.
How do I change my RV lights to LED?
The quickest and easiest way to change your RV lights to LEDs is to buy LED replacement bulbs. Just change your existing RV lights with the new LED bulbs. Make sure that you get the correct fittings on the bulbs, I’ve wasted so many dollars because I didn’t check this first.
Final Thoughts
Adding LED strip lights to your RV is a really quick and easy way of elevating the look and atmosphere. You can also add some other kinds of lights to mix things up a bit.